Data visualization
In this section, you will:
- Discover data visualization with
TableView,TableSelectorandMatrixelements
Tip
Each subsection is independent. I recommend you to overwrite the Program.cs file with the code of each section to avoid any confusion.
The TableView element
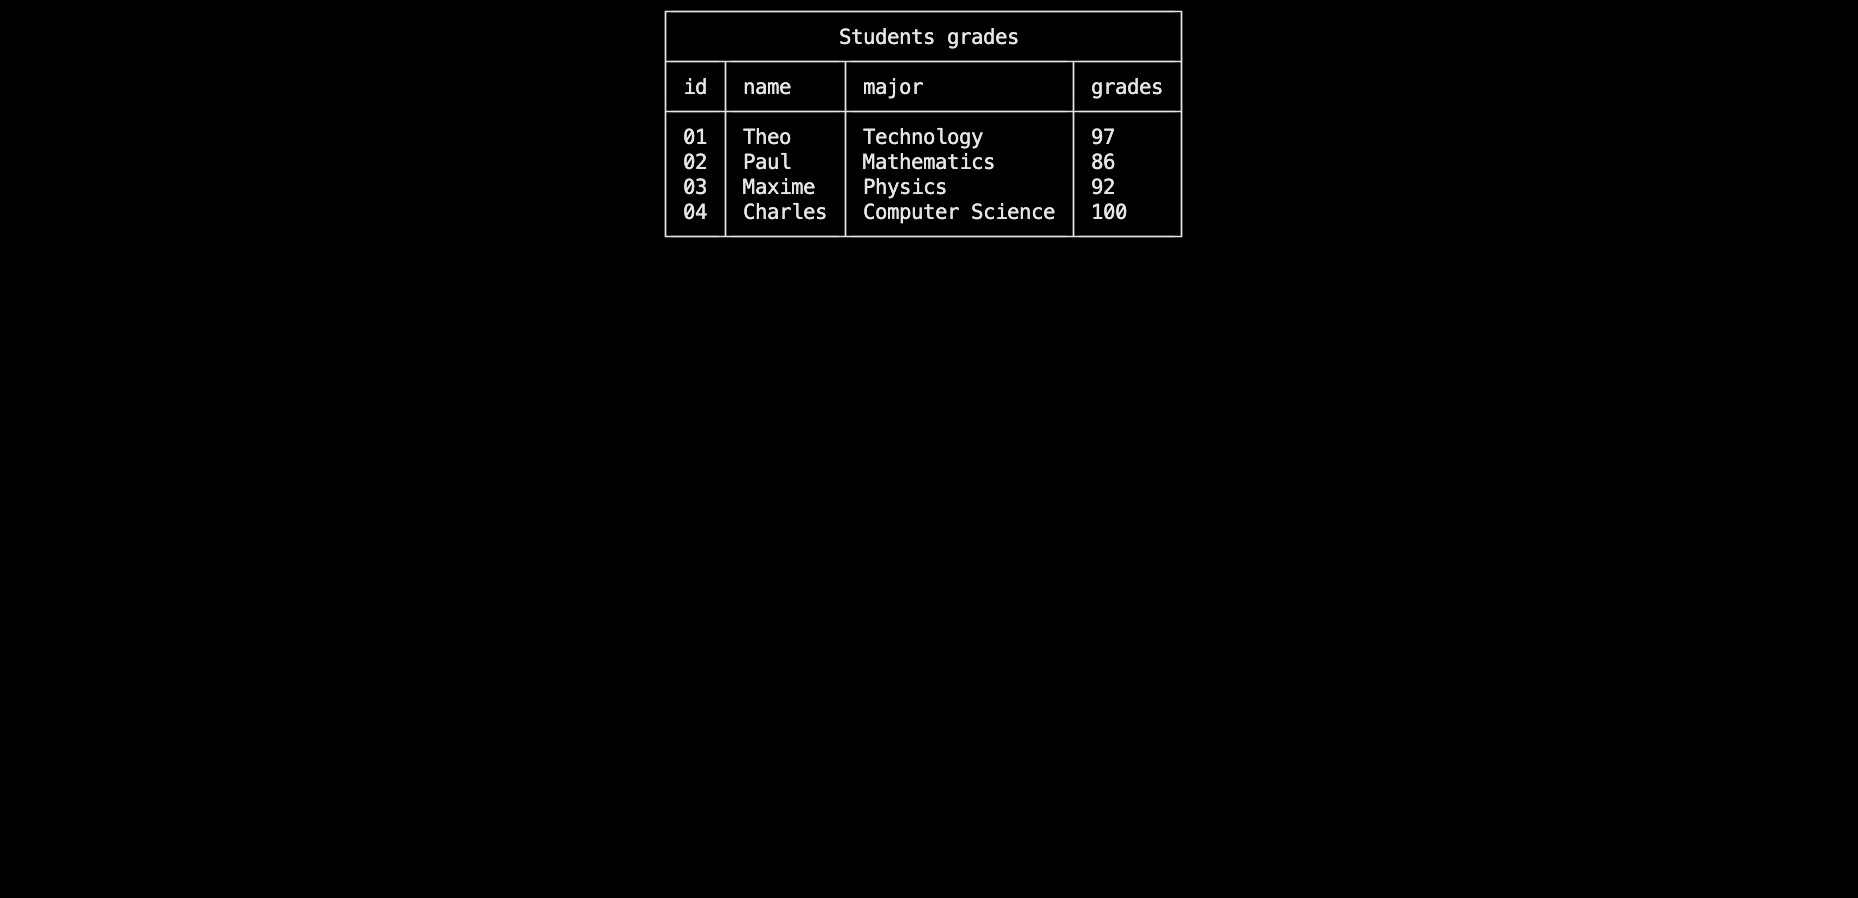
The TableView element is used to display data in a table format. It is useful when you want to display a list of items with multiple columns. Learn more
Let's create a TableView element and add it to the window.
Window.Open();

List<string> studentsHeaders = new List<string>() { "id", "name", "major", "grades" };

List<string> student1 = new List<string>() { "01", "Theo", "Technology", "97" };
List<string> student2 = new List<string>() { "02", "Paul", "Mathematics", "86" };
List<string> student3 = new List<string>() { "03", "Maxime", "Physics", "92" };
List<string> student4 = new List<string>() { "04", "Charles", "Computer Science", "100" };

List<List<string>> studentsData =
    new List<List<string>>()
    {
        student1,
        student2,
        student3,
        student4
    };

TableView students =
    new TableView(
        "Students grades",
        studentsHeaders,
        studentsData
    );

Window.AddElement(students);
Window.Render(students);
Window.Freeze();

Window.Close();

The TableSelector element
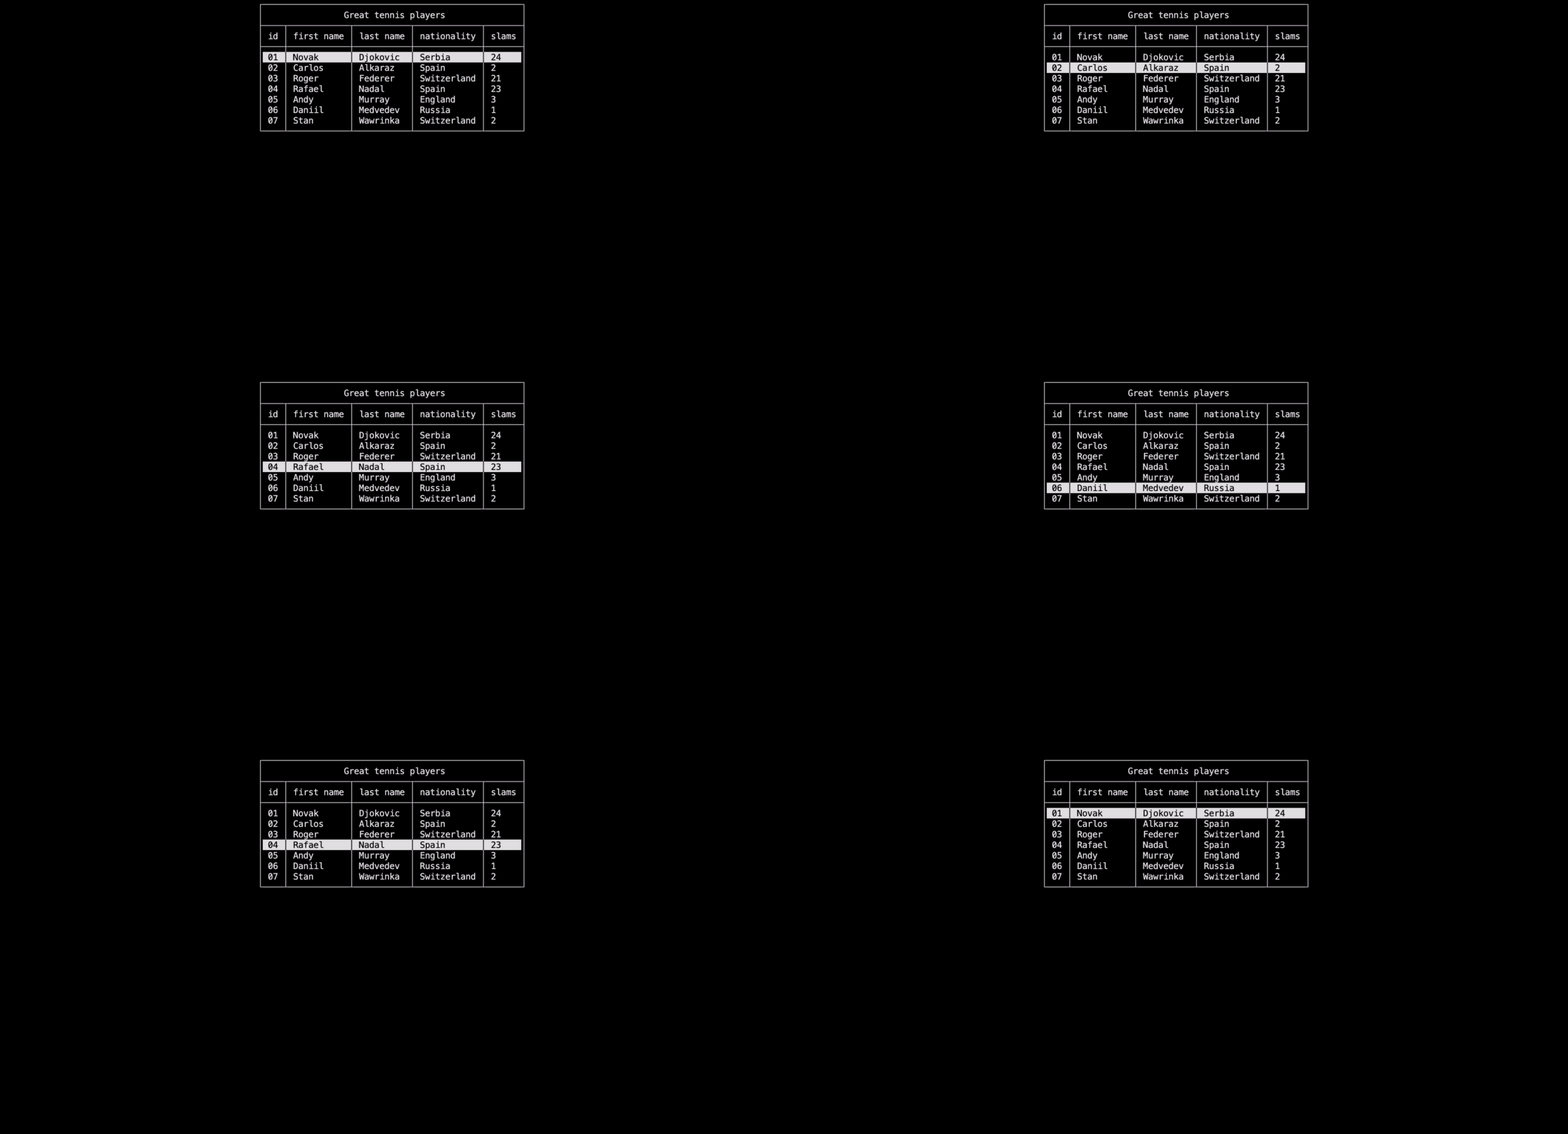
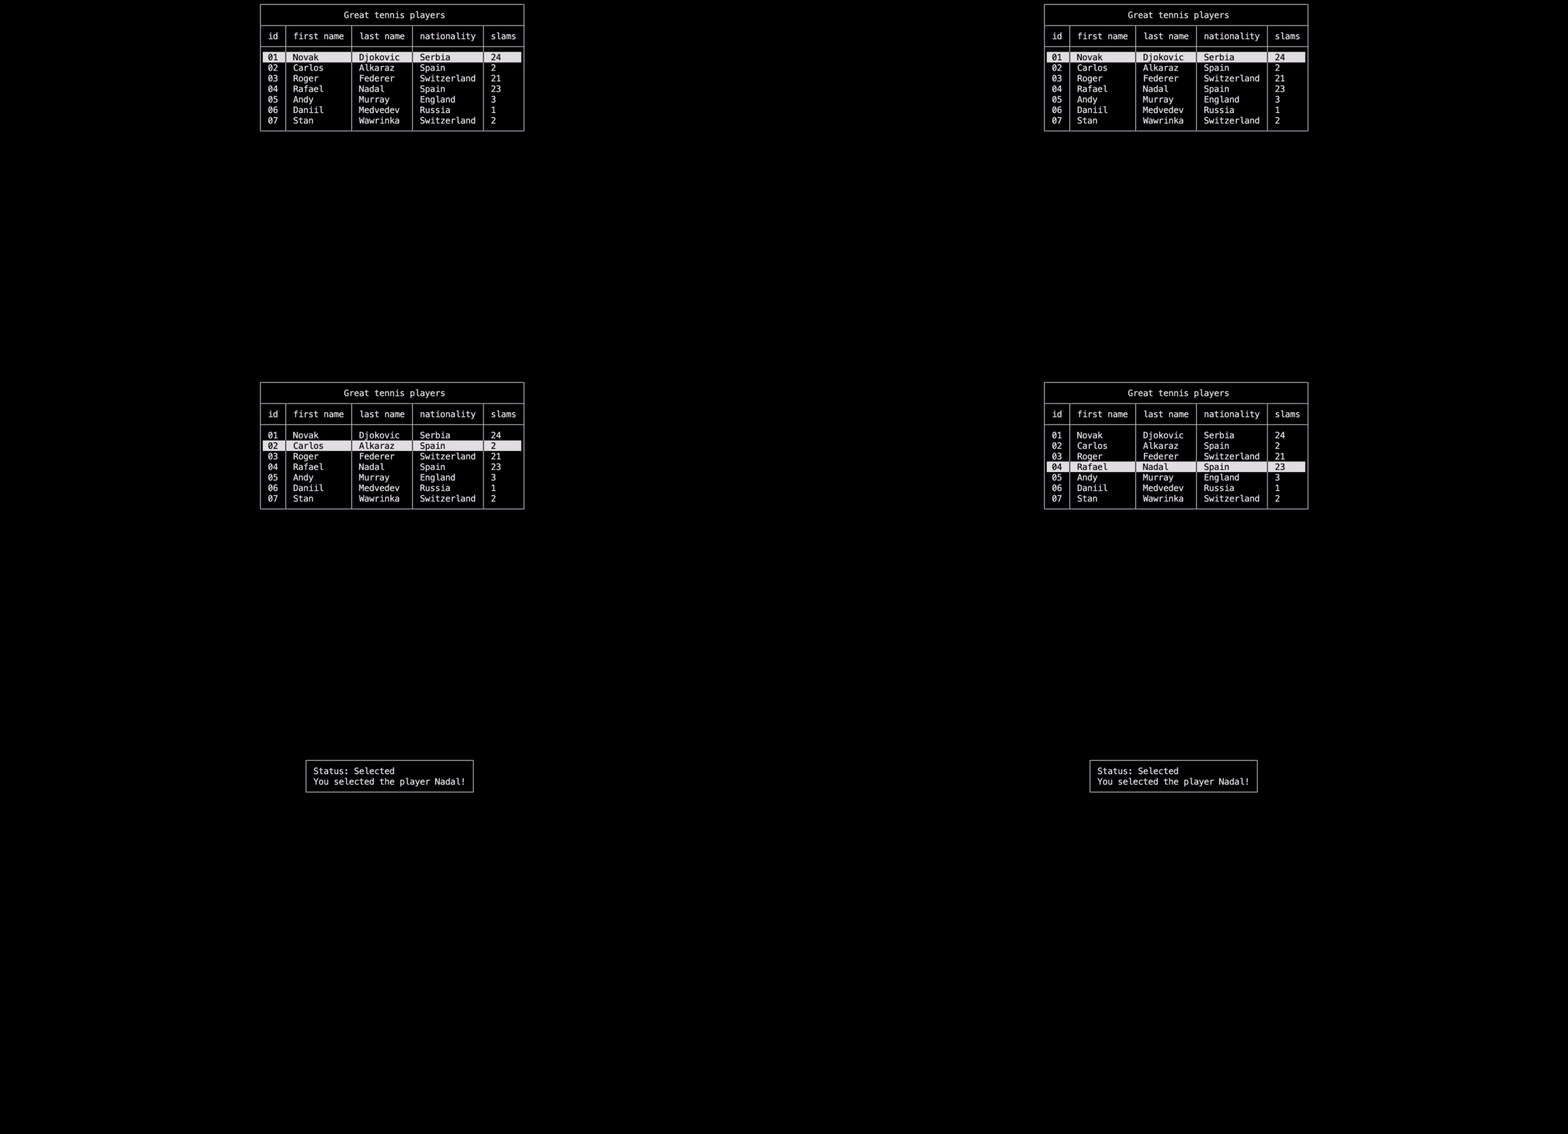
The TableSelector element is used to display data in a table format and allow the user to select a row. It is useful when you want to be able to interact with a table. You may use the Up and Down arrows or the Z and S keys to move int the selector. Learn more
Here is an example of how to use it:
Window.Open();

List<string> playersHeaders = new List<string>() { "id", "first name", "last name", "nationality", "slams" };

List<string> player1 = new List<string>() { "01", "Novak", "Djokovic", "Serbia", "24" };
List<string> player2 = new List<string>() { "02", "Carlos", "Alkaraz", "Spain", "2" };
List<string> player3 = new List<string>() { "03", "Roger", "Federer", "Switzerland", "21" };
List<string> player4 = new List<string>() { "04", "Rafael", "Nadal", "Spain", "23" };
List<string> player5 = new List<string>() { "05", "Andy", "Murray", "England", "3" };
List<string> player6 = new List<string>() { "06", "Daniil", "Medvedev", "Russia", "1" };
List<string> player7 = new List<string>() { "07", "Stan", "Wawrinka", "Switzerland", "2" };

List<List<string>> playersData =
    new List<List<string>> ()
    {
        player1,
        player2,
        player3,
        player4,
        player5,
        player6,
        player7
    };

TableSelector players =
    new TableSelector(
        "Great tennis players",
         playersHeaders,
         playersData
    );

Window.AddElement(players);
// Contrary to the TableView, the TableSelector is interactive,
// so we do not have to stop the execution to see it, but to activate it
Window.ActivateElement(players);

Now let's collect the user interaction response by adding the following code:
var response = players.GetResponse();

Dialog playersEmbedResponse =
    new Dialog(
        new List<string>()
        {
            "Status: " + response!.Status,
            "You selected the player "
                + playersData[response!.Value][2]
                + "!"
        }
    );

Window.AddElement(playersEmbedResponse);
Window.ActivateElement(playersEmbedResponse);

Window.Close();

The Matrix element
The Matrix element is used to display data in a matrix format. Learn more
Window.Open();

List<int?> firstRow = new List<int?>() { 1, null, 2, 7, 9, 3 };
List<int?> secondRow = new List<int?>() { 4, 5, 6, 8, null, 2 };
List<int?> thirdRow = new List<int?>() { 7, 8, null, 3, 4, 5 };
List<int?> fourthRow = new List<int?>() { null, 2, 3, 4, 5, 6 };

List<List<int?>> data =
    new List<List<int?>>() {
    firstRow,
    secondRow,
    thirdRow,
    fourthRow
};

Matrix<int?> matrix = new Matrix<int?>(data);

Window.AddElement(matrix);

Window.Render(matrix);
Window.Freeze();

Window.Close();

Conclusion
In this tutorial, you learned how to use the TableView, TableSelector and Matrix elements. You are now ready to start the menus management tutorial.
Have a question, give a feedback or found a bug? Feel free to open an issue or start a discussion on the GitHub repository.